Friday, October 19, 2012

Cauliflower Pizza Crust and Pizza

Since we’re on Wheat Belly, (by Dr. William Davis) I made this pizza using cauliflower instead of flour.

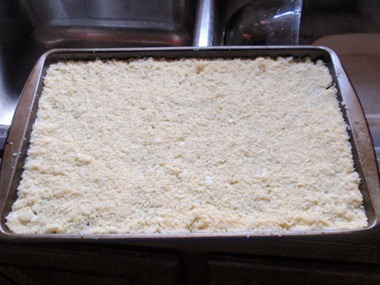
This is the pizza crust before I cooked it. I cut up the cauliflower so I could put it into the food processer and chopped it up until it resembles rice. Then I added some mozzarella cheese to it as well as 2 eggs and then pressed it into the oiled cookie sheet and baked it until golden brown. It is a little crumbly when you put it into the pan but it will work.

Pizza Crust

Then while that’s cooking I cook all the ingredients for the top of it so they will all be done as well. Then all I will have to do is melt the cheese on top.

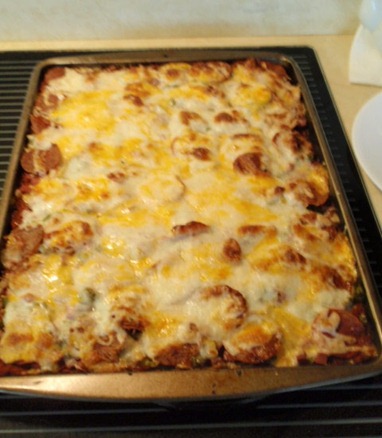
pizza ready 2 eat

Here it is all ready to eat. I put turkey, pepperoni on it and onions and bell pepper as well as the pizza sauce and 2 kinds of cheeses.

I went to Google and googled cauliflower pizza crust and found several. I think I have even saw one that has cream cheese in it and I bet that’s really good. The next time I make it I think I will put some oregano into the crust. I think that would really be good as well as some garlic powder.


Dr. Davis also has a flaxseed wrap that I make and use for a pizza crust. I really like that one to. I do add sea salt to my crust. The recipe is in his book.

If you’ve never tried a cauliflower pizza crust you should because it’s very good and doesn’t shoot the blood sugars up like flour crust does. If you don’t like cauliflower don’t worry because it’s not very cauliflower tasting either. I’m really not wild about cauliflower but I like this.


Hope you all have a great weekend!

Rose

Monday, October 15, 2012

Old Quilts and Accomplishments

I just love old quilts! How about you? I love quilts period! I’m just not a blanket gal at all! Yep I like the quilts. They make you feel soooo cozy in bed with their weight.

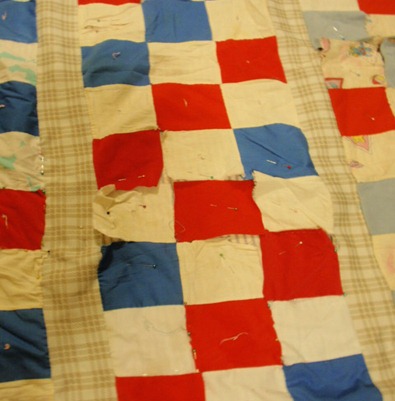
So when I found this one at the thrift store this year I could not turn it down even though it wasn’t the size of my beds. I figure we can use it in the living room as a throw. It has cotton in it and since my family did upholstery in Alabama for about 50 years now I knew I could not pass it up because of the cotton and because it WAS A QUILT. (grin)

When I was a kid my Daddy, Uncle Mark, and my Pawpaw, Tom as he was called, worked in the upholstery shop. I used to dearly love going in it when I was a kid. They had this huge huge piece of equipment that cleaned and fluffed the cotton. There was cotton all over everything even the roof. It was all over and looked like snow. So this old quilt was just for me because it brings back great memories of my childhood. It’s not the prettiest quilt in the world but I do love it. It is in need of a little repair and TLC which I will get to one day. I can’t help but wonder who made it.

PA153673

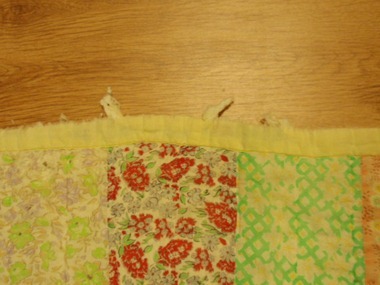
Like I said it is filled with real cotton and the edges are really messed up and the cotton is coming out. I want to put a new band around it but I don’t want to use new fabric so I’ve been on the look out for some old solid color fabric to put on it.

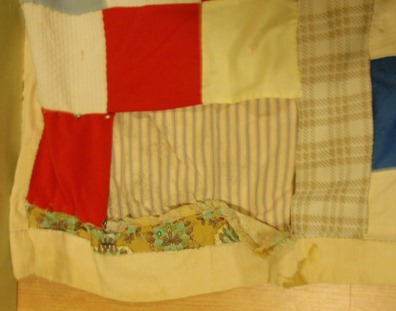
You can see the edge of it on this next photo and the cotton.

PA153674

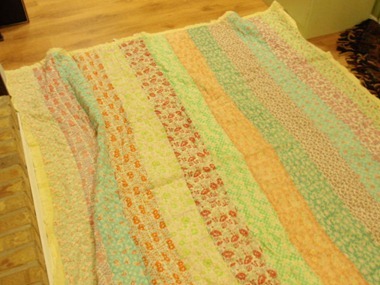
This next quilt was made by my MawMaw, my Daddy’s Momma. She made quite a few quilts in her days. Mostly made out of need to have something to cover up with. I think she must have ran out of fabric on this one because the last row of squares are different than the others. She had an old peddle type Singer sewing machine but it was always out on the porch which had a bathroom built onto one side of it. They had closed in the porch to make the bathroom. The house was really old and I dearly loved it to! She always kept the sewing machine in the bathroom.

PA153675

My MawMaw used the things from the upholstery shop most of the time to make all her quilts with. They used something called ticking to make the mattresses with. She used that to fill this one with for the inside liner. She didn’t hand quilt it but she DID hand sew all the pieces together. It’s coming all apart and I am working on fixing it back. So I have pens all in it to hold the pieces in place. She didn’t have a design in mind I don’t think other than rows and bands in between the rows. She just tied the back, front and the inside liner together with ties to hold it altogether and then put the band on the outer edges.

As a child we had one she gave us to slept under. I have that one to although it IS falling apart and I do mean bad. I wont ever part with it though and have tried to think of a way I could use it but can’t bare to cut it apart. Is that not the weirdest thing you’ve ever heard of? It’s falling apart and has holes all in it but I can’t make myself cut it up to make something from it.

On the next pic you can see all my pens. It’s like this in loads of places. I even thought about taking it apart from the little bands on each row of squares and sewing it back together with the sewing machine but again I can’t bring myself to do that. I wanted it as close to the way my MawMaw made it as I can get it. I’m even hand sewing it all back together. I dearly loved that woman to pieces! Someone must have given her these scrapes for her quilts because all I ever remember her sewing was quilts and these weren’t upholstery fabrics.

PA153677

In this next photo you can see the ticking they used at the upholstery shop to make the mattresses with, and again more straight pens. I have misplaced 2 of my blocks and I sure hope I can find them!

PA153680


I promised another blogger I would share my quilt with her so that’s another reason I wanted to make this post. She had also found a quilt and I think hers was found at a garage sale and she got hers free. Mine was about a 1.00 at the thrift store. That was the first quilt I showed you.

I also wanted to tell you that I had a good day today and got some of the things on my “to do” list done. I had two old table clothes that needed re-hemming. One I just bought this spring at the thrift store and it was a Christmas table cloth and was surged along the edges but the serge was coming off. SO I surged it again. Then I had an old gold one that I’d found a few years back also at the thrift store. It was a square one and I have an oval shape table. So I made it into an oval shape and then surged the edges. I had enough extra that I had cut off it to make 4 small napkins to match.

Then I also hemmed all hubby’s pants. Yep got that done to. So I feel a little better about getting those few things done anyway. I also got the bedspread out to get started on that to.

I will probably share Christmas photo’s at Christmas time so I will share the table cloth then.


I hope you enjoyed seeing my old quilts.

Rose

Sunday, October 14, 2012

So Much to Do, Getting Over Whelmed


Going to really talk about myself in this post. Not meaning it to be selfish but just sharing I guess you’d call it.


I don’t know about you ladies but I am over whelmed these days because I have so much that needs doing and I can’t get it all done. I have SO MANY projects that I WANT to do and just can’t seem to get them done. So many things that NEED doing and I just can’t get the energy a lot of times to get it all done. If I allow myself I could get depressed with it so easy because it is VERY discouraging!

Something Gina said over at Home Joys got me to thinking yet again the other day. I am a perfectionist and it’s very bad. I am almost NEVER pleased with anything I make or do in my projects because I see what I did “wrong” with them. I have had to work on this for many years now. So that makes me procrastinate sometimes in projects dreading it not turning out like I in vision it to be. No one else sees my mistakes but I do.

I haven’t felt well for a little over a year now so everything has just been put on hold that wasn’t an entire need to be done. Now that I am feeling better most days I am wanting to get some things done and have to keep reminding myself to not over do. For instance……

1. An old quilt I found at the thrift store that is in much need of some repairs. (so it can be used this winter as a throw)(But not REALLY a NEED)

2. Those notebook recipe books need to be finished that are sitting on my sewing table.

3. Hubby’s blue jeans to be hemmed. (not a REAL need, just needs doing)

4. Another pile of sewing and mending that needs doing.

5. Wall paper to be finished in our master bathroom and then mudding,priming and painting.

6. Bought a bedspread that needs repairing and applique to match our bedroom.

7. The rest of the fabric wrapped around the foam boards to be stocked on the cube shelves that were made for all of it.

8. Herds and herds of grass and weeding to be done in the flower beds. Grass also needs mowing right now.

9. Flowers to be transplanted into the flower beds.

10. Goldfish pond that needs cleaning out and the rocks fixed around it with cement so they wont keep falling into the pond.

11. Piles of pine limbs to be picked up in the pasture and burnt from the pine tree cutting mess hubby decided to do. That would be his project if he would choose to do it.

12. A stack of magazines and books of mine sitting on the sofa to be gone through to be given away or to keep.

13. Need to de-clutter this house again.

14. and I could go on and on and on and bore you to death but that should let you see into my world a bit.

I have a ruptured disk in my back as well so I can’t just go and go and go like I used to because it gets inflamed now when I do.

I wish it was in the budget to get some help around here at least once a month but it’s not, so it just keeps piling up.

Anyway it’s just so easy for me to get over whelmed with it all since it’s not getting done. I just have to back up from it all and say, OK Lord here I am again and I just need Your help again because I can’t handle all of this. I could sit back and feel sorry for myself to but I’m not going to do that because God wouldn’t be happy with me thinking like that either. It’s so hard to be content in these circumstances but I HAVE to at least try to bloom right where I am planted. I just don’t handle things being piled up very well. I was always taught to get in there and get er done and THEN you can rest. I can’t rest when I have a load of clothes sitting in front of me that needs folding. But when you’ve been physically fatigued to the point it’s hard for you to breath for over a year you’re forced to just wait until you CAN do it if someone else doesn’t choose to do it.

Then I also have to remember that I need to chill out and not over do since I have started feeling a little better and have started to do more. I am still having a lot of health issues but I am praying and hoping we’re nearing the end to getting it all figured out. Life can really get over whelming if we allow it to and start to thinking why me or why why why. I constantly have to turn things over to God and say to Him, ok You’ve got to help me, I can’t handle this.

I’m sure everyone gets over whelmed at times. Especially if you’re not well and able to get it done and don’t have someone to do it for you. Then you see it just keep on piling up on you. I pass old folks homes that I knew that ALWAYS kept their place looking SO NICE when they were younger and able to do so and my heart just aches for them because I know they’re not able to do it. It’s just so sad to me.

I have thought, ok God I KNOW there is a purpose for this and I know things happen for a reason. So could you please tell me WHAT the reason is please? (lol) Maybe BE STILL and know that I am God again? Since I am a do-er I can VERY EASILY see WHY Martha was asking God to make Mary help her since I am also a Martha because when I can and am able I am always doing. I LOVE to accomplish things and feel lazy when I sit around a lot. I KNOW I need to BE STILL and maybe one day I can get that one figured out on HOW to do it. Maybe sit aside a time each day at the SAME time to BE STILL? That would have worked before hubby retired but not now.

Anyway like me, if you’re over whelmed and wondering WHY, just ask for God to also help you because He can make it much easier to handle when we ask Him for help. We can’t go and take it into our own hands because that’s not pleasing in His sight. So just hang in there and visually see yourself handing it all over to God in His hands. The load gets much lighter for you!!!!

Hugs,

Rose

Sunday, October 7, 2012

Country Girl Creamery 1st Annual Dairy Festival

I have been wanting to go to this place for quite sometime now. When our daughter came into the kitchen yesterday announcing they were going to have their 1st annual dairy festival today I was more than ready to go. They had a wonderful turn out and was excited to see such a very large crowd there that they didn’t expect.

We’ve been buying their milk for awhile now from a few little stores around that sells it. It’s un-homogenized milk and also pasteurized at the lowest possible temperature to maintain more calcium and protein. It’s like 12% higher in calcium and 8% in protein higher than regular milk.

We had to take a few pix of all the ladies as they call them. I keep wanting to say girls but it’s the same I guess. (wink)

Here are the ladies coming in to get milked.
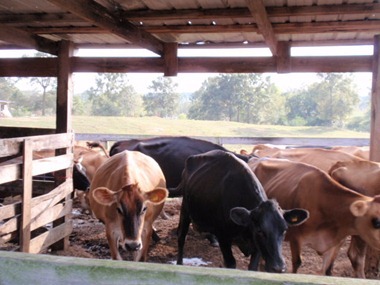
PA063590

They have quite a herd of ladies. They said they are in between grasses now and are having to be fed some food and some hay they have in bales out in the pasture. They wrap the bales in white plastic stuff and it makes them like look giant marshmallows. But normally they are just grass fed from all the pastures they have.
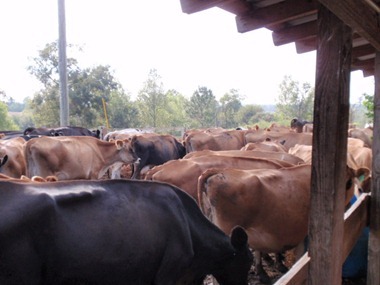
PA063591

Grabbing a drink of water before they go in to be milked.
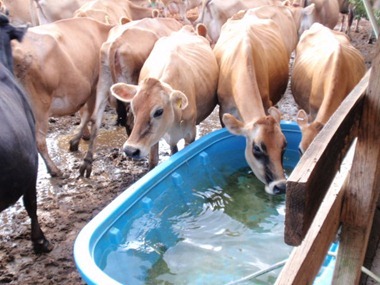
PA063594

They look a little skinny right now but I guess it’s because they are in between grasses. They only eat the grains when they are being milked and the bales of hay aren’t as good as the green grass.
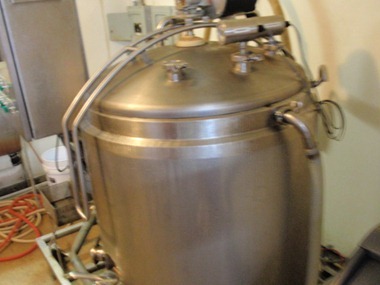
PA063596

I can’t remember what she told us this was. They also make cheeses to so this could be something to do with the cheese making. They have to heat the milk up to make the cheese. They let us taste all the different kinds of cheese and oh man it was yummy! Needless to say I had to bring some home with me along WITH some of their milk and their butter.
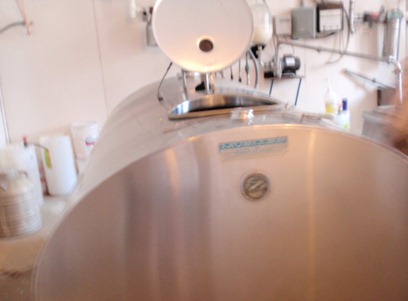
PA063597

This is the pasteurizer. They fill each gallon of milk by hand from this thing. WOW That’s A LOT of milk filling by hand!
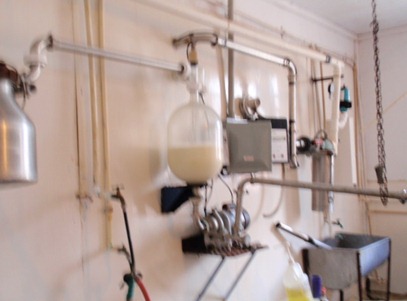
PA063598

Sorry but this pic is a little blurry. You can see the milk coming in from the cows being milked in the little clear glass bottle on the wall. As it got about 3/4 way full it would run out into one of those pipes.
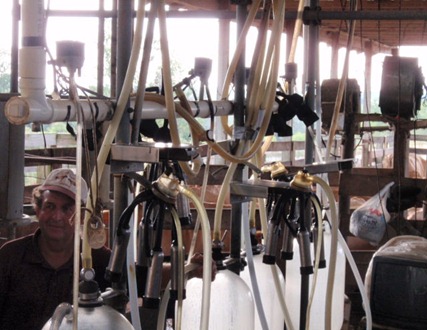
PA063599

This is the milking area. He was telling us all about how they milk and how they clean their bags and disinfect them etc. See all those glass bottles toward the bottom of the pic? All the milk was going into those. They had just gotten started milking that batch in this pic. Then there is this clear pipe that is about 3 inches around that is above them. It would go into that pipe and then into the room with all the stainless steel containers to be pasteurized.
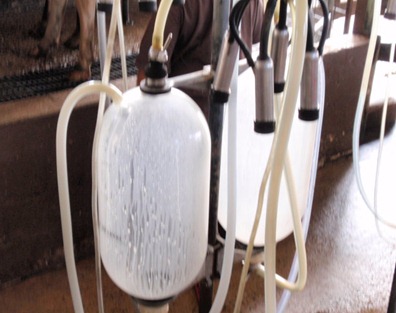
PA063604 

Close up of the containers the milk goes into from the cows. The things hanging above the one to the right that are silver and black is what they attach to the cows bag if you’ve never seen them.
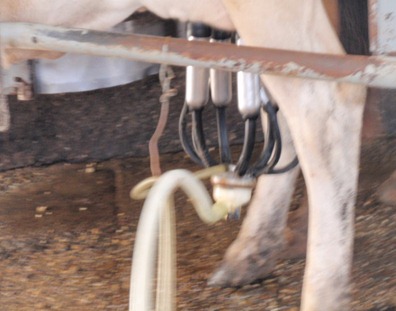
PA063609 

Here they are attached to the cows bag.
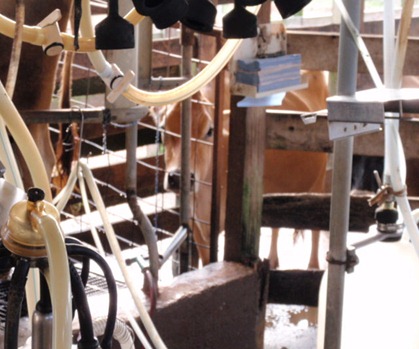
PA063613

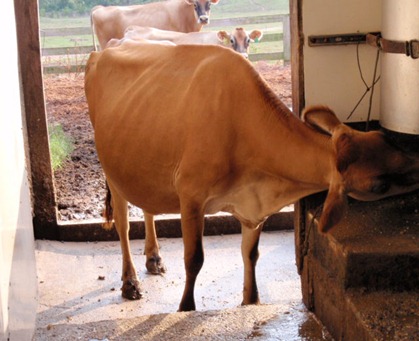
Then here’s one of the ladies waiting to go into the stall to be milked. She was watching us.
PA063618

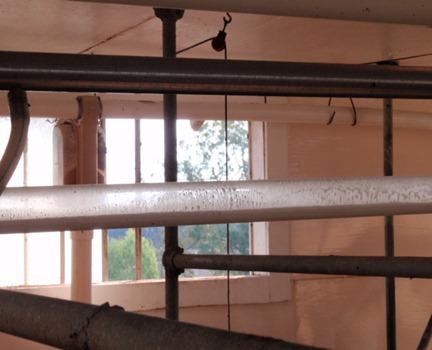
Here is the clear pipe in the middle of the pic. It carries the milk from the cows to the other room.
PA063620

See this one stealing more food? She has already been turned out from milking and she came back for some more food. See the other two behind her looking at her like now what are YOU doing?
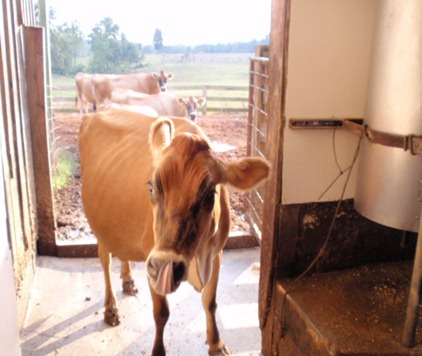
PA063622

Look at that tongue! lol She’s telling me, yummy, see how good this stuff is. The other two are STILL watching her. I bet they are wondering IF they could get away with doing that to.
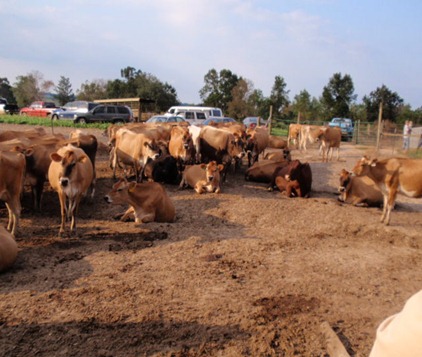
PA063625

All these are waiting to be milked. Some of them got tired of waiting I guess and decided to lay down. (wink) They can only milk like 3 at a time since we were standing in one of the areas they usually milk them in.
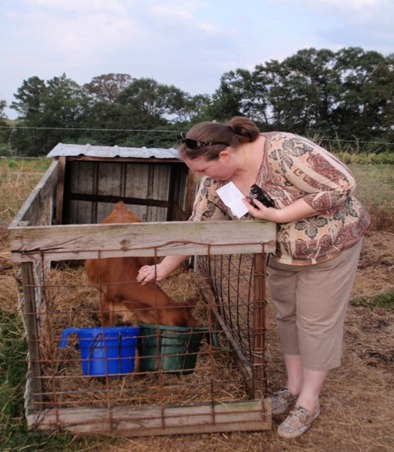
PA063628

Cindy, our daughter petting one of the babies. They had several babies for the children to feed if they wanted to. They were letting them feed them with the bottles.
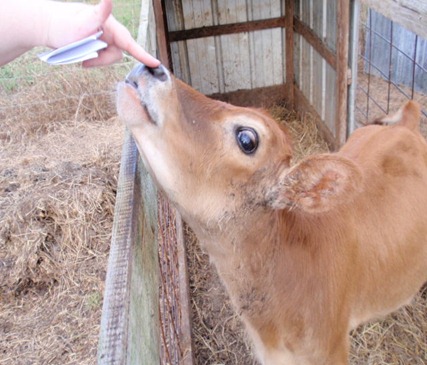
PA063631

And she’s petting another one here. Looks like a little deer without spots. I just love the jersey cows better than the others for some reason. I guess it’s just the color of them.

PA063633

They even had these fake cows sit up for the children to milk. Some of them were getting milk out to.
PA063634

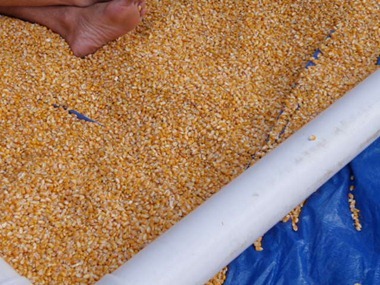
What fun, even corn to get down and play in like sand. The kids were having a blast in that as well as the bigger kids to. This thing was huge and filled with corn.
PA063635

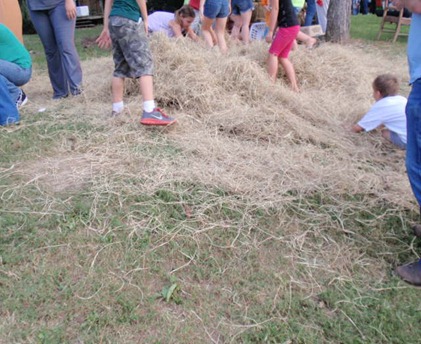
They even had hay for them to play in as well.
 

PA063636

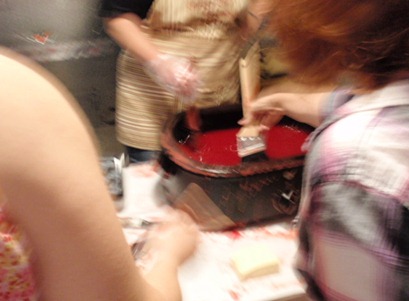
Sorry but this one is a little blurry to. Painting the wax on their blocks of cheese.
PA063639

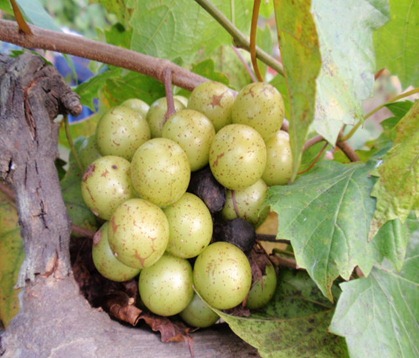
I even found some muscadines to take a pic of.
 

PA063627

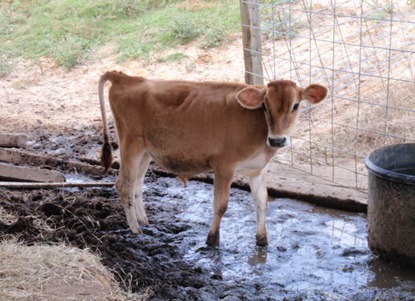
Another cute little baby. Isn’t it precious?


Now I think I am going to pop us some popcorn and use some of our Country Girl butter on it as we watch a movie. Winking smile


Rose
Wednesday, October 3, 2012

Lowering My Grocery Bill


I was surfing around checking out some of my favorite blogs yesterday when I came upon this idea.

Let me back up some…. as you women know if you’re the one that shops for the groceries for your family, you can eat up your grocery money in a hurry by having to buy cleaning supplies and paper products or non food items. Every two weeks I have to buy bath tissue and paper towels and they’re not cheap as you know.

So I have been trying to figure out HOW I could avoid having to buy soooooo many paper products. When we’re out of napkins we use paper towels for napkins so the paper towels don’t go very far at all when we do that. Hubby can use 3 napkins at each meal and sometimes we (our daughter and I) have to have another one as well. I like to buy the paper towels for draining fried foods on so we can get some of the oil out, so that’s really why I buy those.

So when Gina over at HOME JOYS BLOG SPOT posted her idea I knew I had something I could do.

What Gina’s idea was is this. She had been wanting to make them some cloth napkins but just never found the time to get it done. She’s another very busy lady. So one day she thought about this one that wouldn’t take her so long to make. She had some old dish towels she could use so she split them into 4 napkins and just zig zagged the edges right quick so they would have cloth napkins to use. She still plans on making the others when she finds the spare time to do so.

So when she said old dish towels it hit me, I have a nice thick blue house coat someone gave my daughter. She was there when they were cleaning out their closet and the neck was messed up on the terry cloth bathrobe so they gave it to her. I guess she was going to use it for the cats or dog to sleep on or just bringing it to her Mommer as she calls me, since she knows I can find another way to put it to good use.  I guess I’m a little like my Maw Maw since I am frugal. The cloth is still good and nice and thick like I said before. I just tossed it in the sewing room knowing there HAD to be a good use for it.

So I sit down today and started cutting out small napkins from the old bathrobe. I made them about the size of bath clothes since I hate those old huge cloth napkins. I surged the raw edges of them with my serger. I didn’t have the blue color thread but did have some black so that’s what I used.

I wanted to share with you all just how I went about it just in case you to have an old bath robe or some other piece of clothing you could use and not throw away.

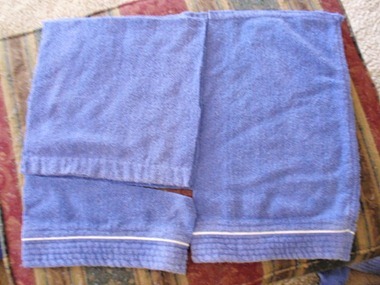
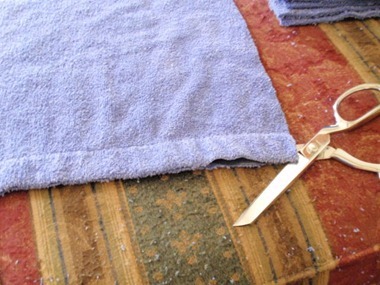
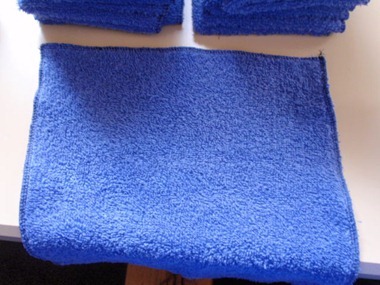
First I took the pockets off the front of it with my seam ripper. It didn’t have pockets in the side seams. They were on each front panel. This is the size I chose to make my napkins in the pic below. This is one of the sleeves I cut out and cut open. As you can see on the right side, the piece wasn’t quite as big as the napkins I was cutting out. BUT I went with it and used it anyway since it was SO close to the size. I just cut as close to the arm hole seams as I possibly could to get the sleeve off and then opened it up cutting as close as I could to the seam up the arm as you can see on the right edge of the pic, the seam is still there.

PA023576

In the pic below you can see me cutting off the band down the front of it again cutting as close to that seam in the band as I could so I could have a wide enough area to cut out more napkins.

PA033578

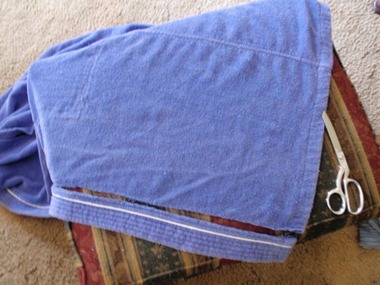
I put my pattern right on the bottom hem and started cutting the napkins out up the front side panel of it until I had used all the fabric on the fronts. In the next pic you can see where I cut the hem at the bottom. Now I can go and rip out the back piece on the hem to get it off and that way I didn’t waste that area where the hem was. I got seven napkins from the two sleeves and one of the front sides!

PA033580

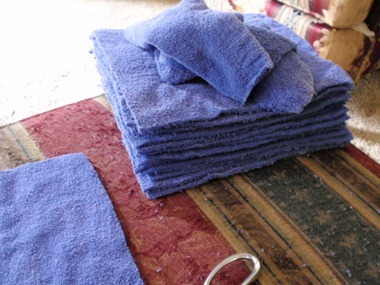
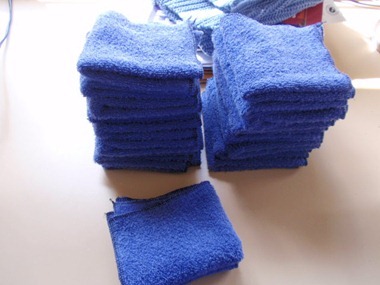
As you can see I got quite a stack of napkins from this old bath robe. By the way I DID wash the bath robe but when I got finished surging the edges I washed all the napkins so they would shed all their pieces of fabric (from me cutting it up) and it wouldn’t make a mess on our table every time we used one. In fact they are washing as I make this post. I had 3 or 4 of the napkins I had cut out with the hem on them that I had to cut and then get the seam ripper to. It didn’t take that long. I probably have about an hour to an hour and a half in it all.

PA033582

Here in the next pic you can see one of them I have surged the edges of.

PA033585

And here they are finished. Like I said I got 20 napkins from this bath robe. There are two smaller ones that I folded in front of the others.

PA033584

I hope you can also find ways to save money on your grocery bill and I hope this was helpful to someone.

Now maybe we can keep some of that cash we were spending on napkins or paper towels for FOOD. Winking smile


Thank you Gina for sharing your idea!

Rose
Tuesday, October 2, 2012

Master Bath Wallpaper

I have finally started working on getting that wallpaper off our master bath room wall. I started working on it yesterday and then stopped. Then last night when I was SUPPOSE to be in bed like everyone else, I worked on it some more. Was almost done with it but knew I needed to get some sleep.

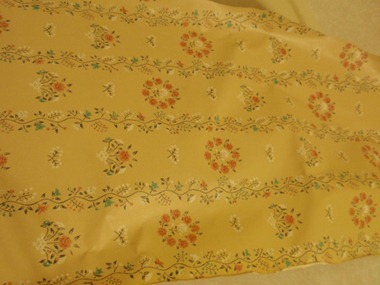
Then early this morning I had to get up and go to potty and you guessed it, I started working on it again. I lack 2 really small areas and I will be done with that. One spot is behind the toilet so I will have to take the tank off to get at that. I peeled the top layer off the wall paper and now I will go back with the steamer and get the bottom layer off. I FINALLY figured out this way didn’t tear the sheetrock up! The bottom layer is really thin so it will come off in large sheets and not take any amount of time to finish with the steamer. This is the ugly wall paper that was on EVERY wall in there. Yep I know, ugly and mega outdated!

PA023573

This is the wall behind the door. In some areas the backing came off on it’s own. This little cabinet here is my sink but the sink doesn’t work so I am really thinking about taking it out and put another board on top so I can cover it with tiles or something to have an area to sit things and also maybe do something like a wooden bookshelf above the sink to put things we use into. We just have NO SPACE in here for sitting our things.

PA023569

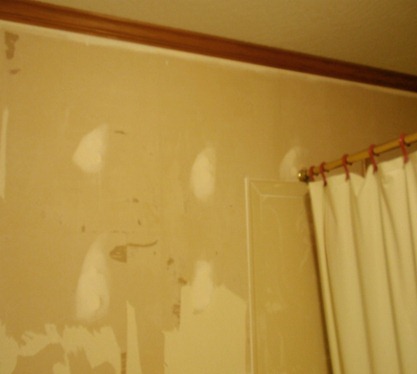
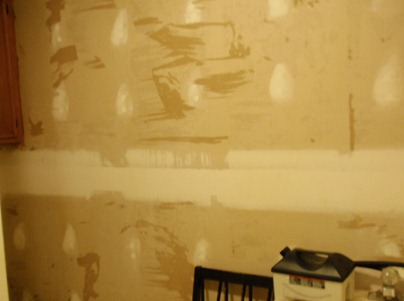
Yep I really messed up on this next wall. I was using the steamer to and it just WOULD NOT come off! Going to TRY and spackle it and then prime the wall. I think that’s the reason it was SO hard to get off because they didn’t prime the walls first. I will also need to sand the walls to.

PA023570

Over his sink. I removed all the mirrors so I could get the paper from behind them. I will have to remove the towel holder and the rod for the shower curtain and get it out from behind those to.

PA023572

Close to the shower stall. We have marble up on the walls in the shower. I am thinking about putting some long narrow mirrors I have up on the walls above the shower, all the way around it. That way it should reflect more light into the shower for us I think.
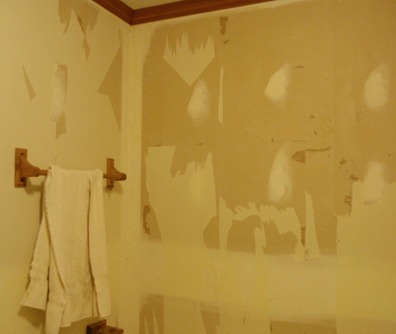
PA023571

My plans as of right now is to paint the bathroom to match the bedroom which is a light sky blue with white trim. It’s a coastal beach theme and I want the same for in here to. Just trying to decide if I want to paint all the walls in here the sky blue or some blue and some white. Going to paint the trim white and the cabinets white so I’m afraid that might be TOO much white if I paint the walls white to.


I also got some things I needed today from town to finish those recipe notebooks with so I will be working on that along as well. Had to rest up some today from the wall paper stuff because getting up and down from that chair so much has got my leg to feeling tight. Sure don’t need to get down in my back, that’s for sure!

What kind of projects you all working on?


Rose